How Clinics Can Use a 3D Anatomy App to Improve Patient Teach-Back
Most patients do not leave a consultation confused because the doctor does not care. They leave confused because anatomy is hard to picture, visits are short, and spoken explanations disappear faster than clinicians think.
The short-visit communication problem is mostly spatial
Clinicians often know exactly what they want to explain. The patient often does not know where to hold the picture.
That is especially true when the visit involves:
- a layered joint or nerve explanation - a procedure path or injection site - a rehab or post-treatment plan - a pain source that is difficult to describe with words alone
In those moments, a 2D poster or a quick sketch may help a little, but it often leaves depth and relationship unclear. The patient nods, the visit moves on, and the real understanding gap stays hidden.
Teach-back works better when the anatomy stays visible
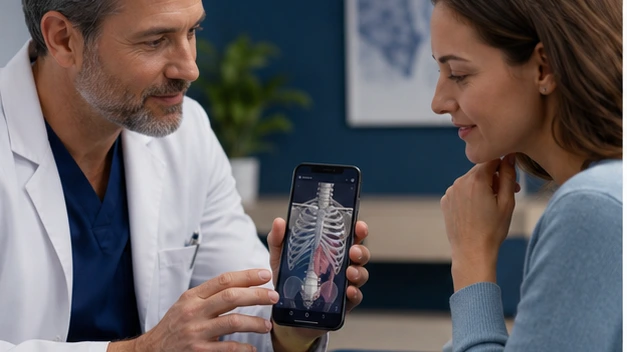
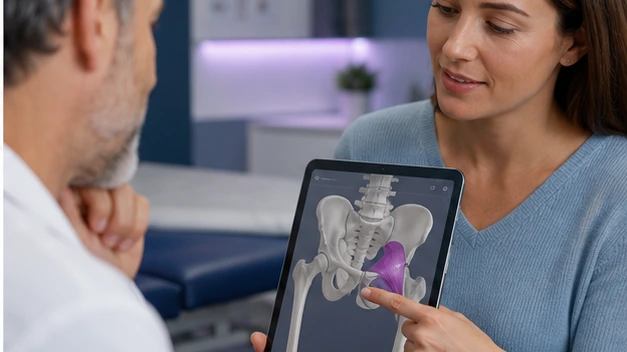
That is where a controlled 3D anatomy view helps. If the clinician can rotate the area, hide one layer, show the key structure again, and then ask the patient to explain it back in plain language, the visit becomes more concrete.
The visual is not doing the counseling. It is stabilizing the explanation long enough for the patient to make sense of it.
That matters most in the visits where patients are frightened, in pain, or hearing several new terms at once. The clearer the picture stays in the room, the easier it is for the patient to attach meaning to what the doctor is saying.
A four-step clinic workflow that actually fits a real visit
1. Identify the one anatomy point that matters most
Do not try to teach the whole region. Choose the one structure, path, or relationship the patient needs for this visit.
2. Show it simply
Use plain language. AHRQ's communication guidance repeatedly emphasizes choosing words patients can understand and act on. The visual should reduce jargon, not decorate it.
3. Use teach-back immediately
Ask the patient to describe the structure or next step in their own words while the visual is still on screen. This is the moment many clinics skip.
4. End with the action
Tie the anatomy explanation to the next patient task: what to watch, what movement to avoid, what the procedure will affect, or what the rehab goal is.
This is a short workflow on purpose. If it takes too long, doctors will not use it consistently.
The workflow also works better when the team uses it repeatedly in the same visit type. If one orthopedic pathway, pain consult, or rehab conversation becomes the standard pilot, the clinic can quickly tell whether the tool actually changes understanding.
The common mistake: showing too much anatomy
Clinic education fails when the doctor treats the app like a lecture tool instead of a consultation tool.
Patients do not need a full anatomy lesson. They need orientation, confidence, and a clear next step. Too many labels, too much region detail, or too many rotations can actually weaken understanding.
Specialists will recognize how much this matters. A sports medicine consult may only need one tendon path. A pain visit may only need one irritated nerve route. The patient benefits most when the explanation narrows before it expands.
What this looks like with MeduTechs
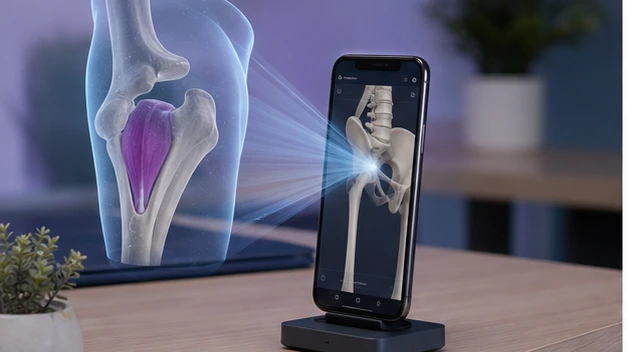
This is where MeduTechs enters naturally for clinics. The strongest fit is not a complex feature tour. It is a mobile anatomy workflow the clinician can actually use during a real consultation.
AR Anatomy on Android is the right primary feature here because it creates a more tangible explanation moment without demanding a simulation-center setup. Supporting tools like Hide-Unhide or a nomenclature switch only matter if they make the patient's mental picture clearer. If they do not help the explanation, they should stay invisible.
The MeduTechs clinic audience page is useful in this context because it frames the product around clinic communication, not only student learning.
That first visit type should be common enough that the team sees it every week and important enough that better patient understanding would obviously help. That is how a clinic turns a nice demonstration into a real operational learning loop.
A better informed-consent and patient-education habit
AHRQ's informed-choice materials make an important point: a signed form is not the same thing as understanding. That matters for clinics because many explanation moments sit close to consent, expectation-setting, or post-visit adherence.
Using a 3D anatomy visual does not solve consent on its own. But it can make a consent-related explanation more concrete. Patients can see what the doctor means, explain it back, and ask sharper questions before the conversation ends.
That makes the tool more than a visual aid. It becomes part of a clearer communication habit.
It can also become a team standard. When clinicians and support staff use a similar visual logic, patients are less likely to hear five different explanation styles from five different people.
When this workflow is most useful
This approach is especially useful in orthopedics, sports medicine, rehabilitation, pain, neurology-adjacent explanation, and any visit where location and structure drive understanding.
It is less useful when the visit does not depend on anatomical visualization or when the team has not agreed on how to keep explanations plain.
That distinction is healthy. The point is not to force the app into every room. The point is to use it where it clearly improves understanding enough that the team would miss it if it disappeared.
That is a better adoption test than novelty. If the visit would feel the same without the visual, the clinic probably has not chosen the right explanation moment yet.
The strongest pilots create a visible difference in the exact visits that used to generate the most confusion.
That is when staff stop treating it like a gadget and start treating it like part of the explanation workflow.
That is the moment a clinic-level pilot becomes worth keeping. It means the explanation changed behavior, not just aesthetics. That is the signal a clinic should be looking for.
Sources and further reading
- AHRQ, “Teach-Back” - AHRQ, “Patient Education and Engagement” - AHRQ, “Plain Language at AHRQ” - AHRQ, “Making Informed Consent an Informed Choice”